Rig Rundown
My 1996 Toyota HIACE Super Custom Limited

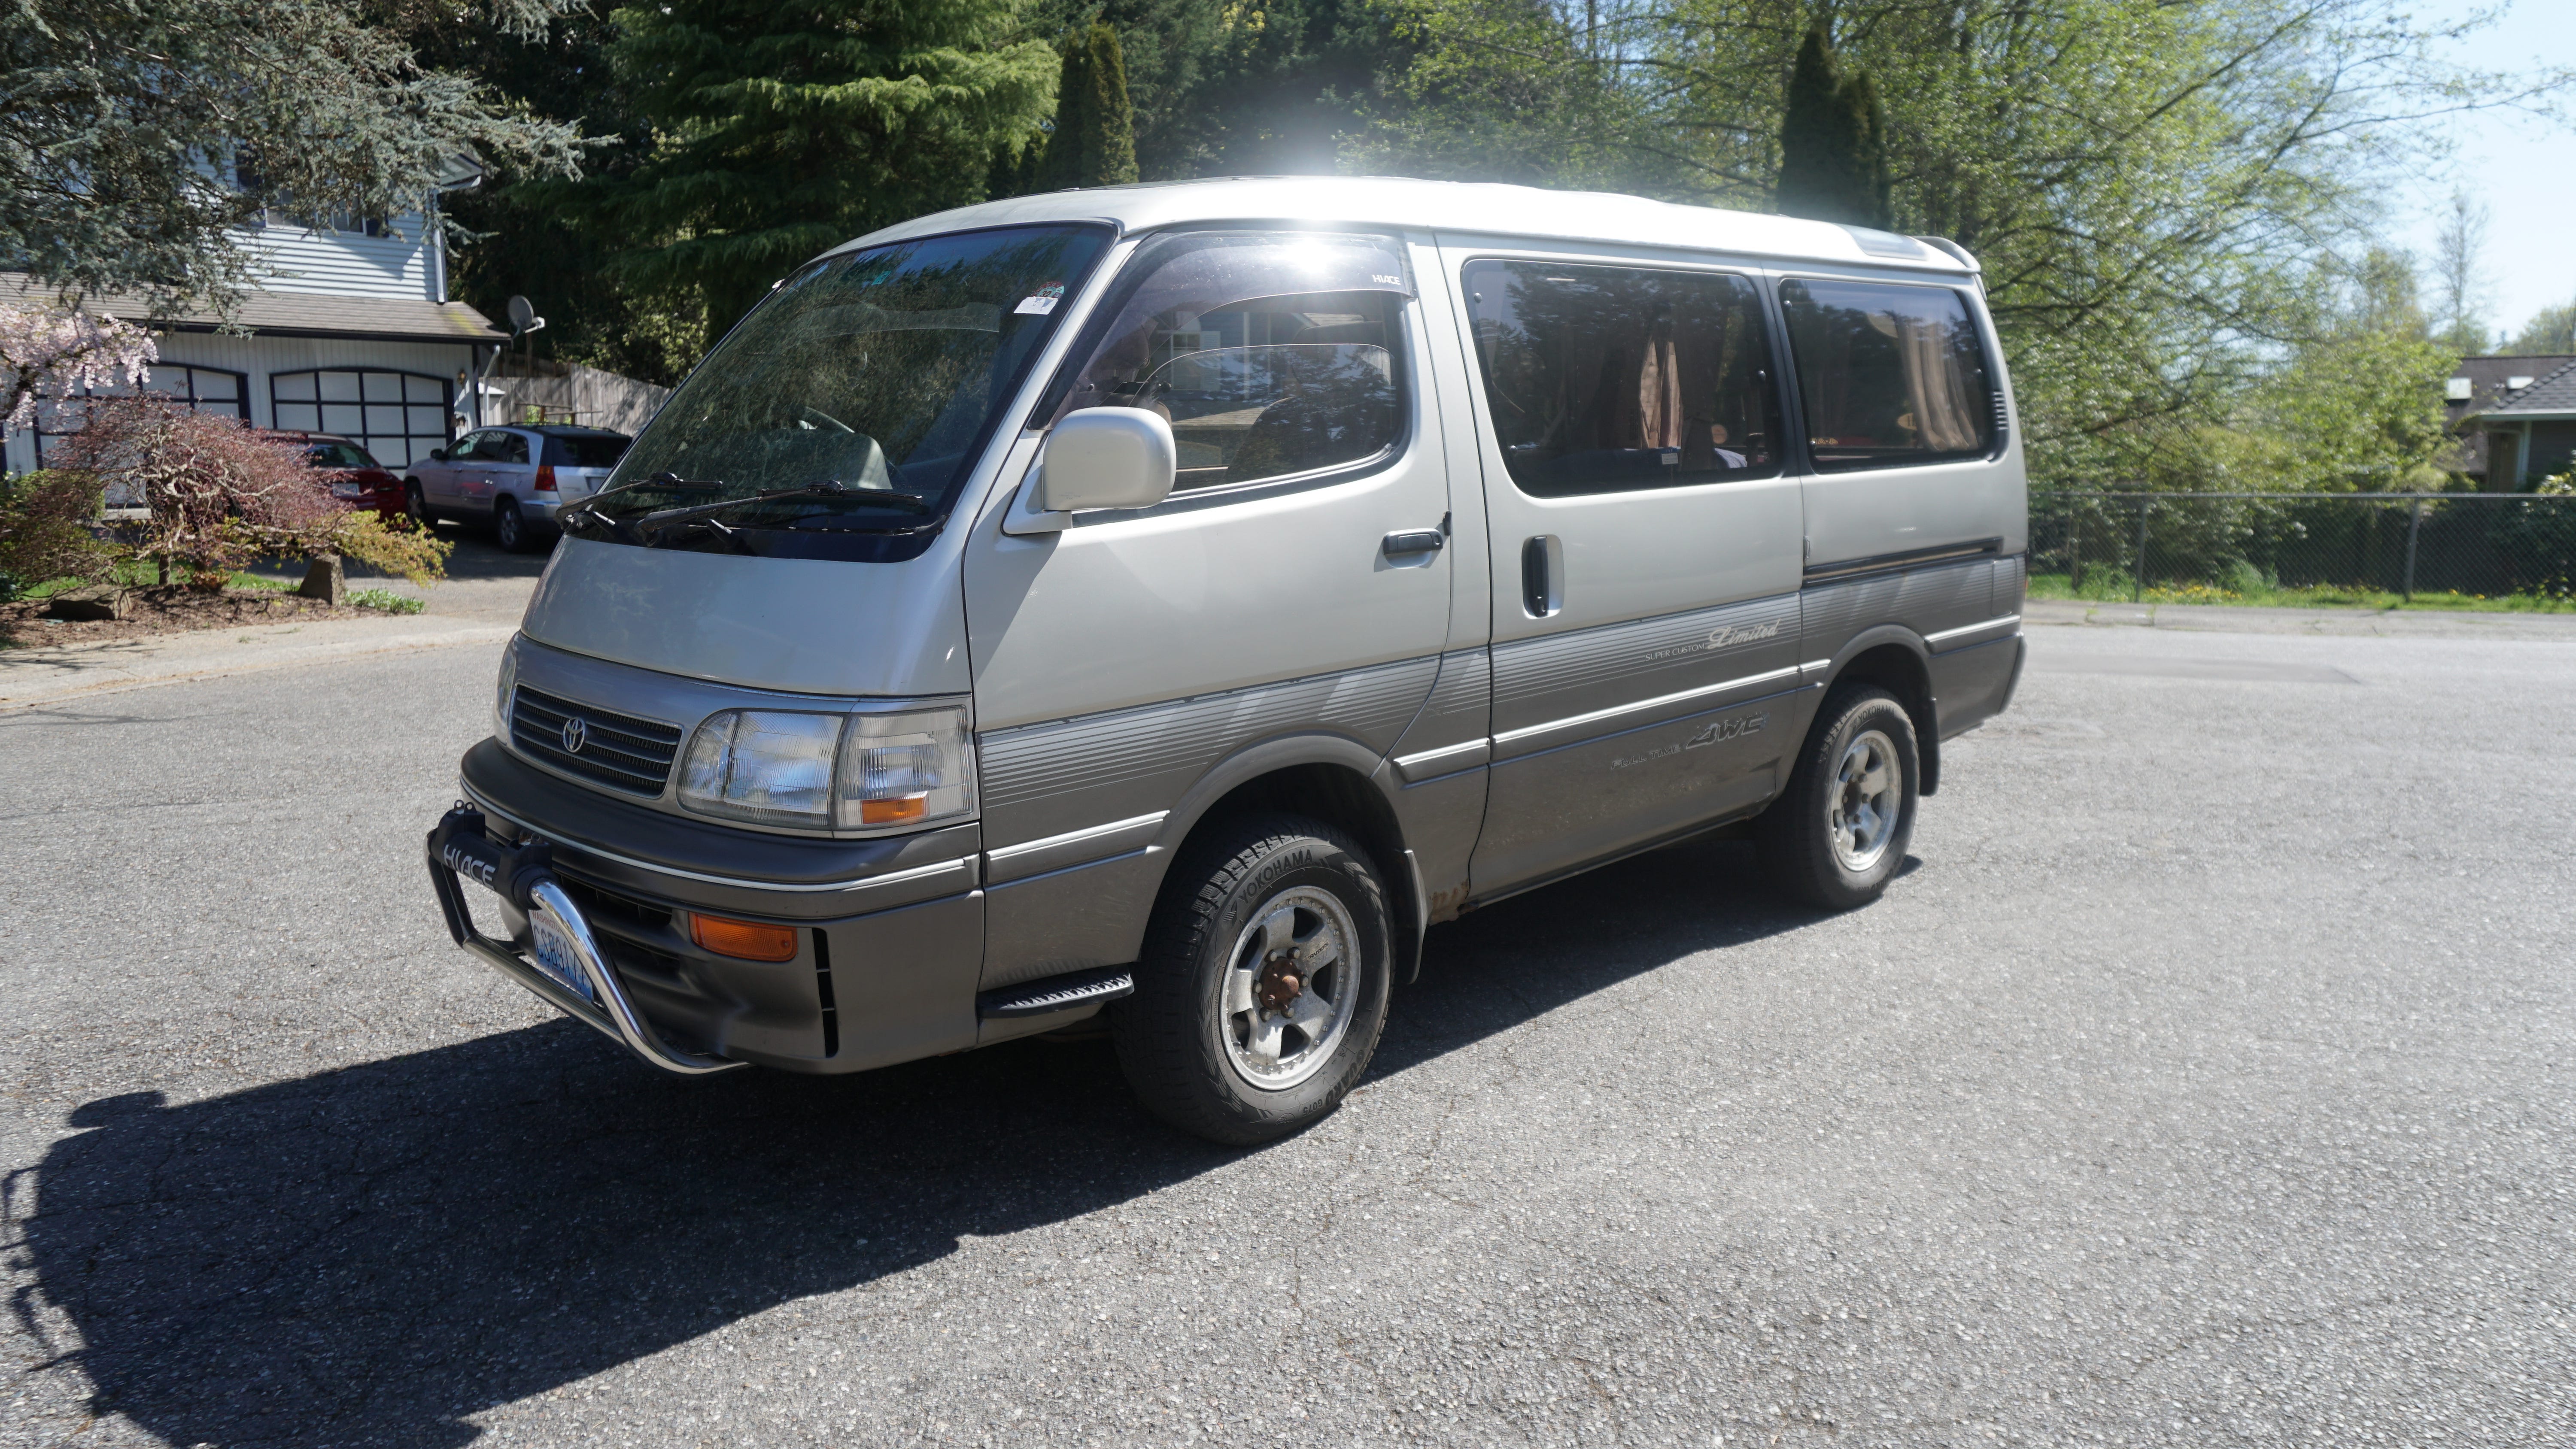
This is my van, Frankenstein.
It’s a 1996 Toyota HIACE, Super Custom Limited.
I purchased it for $12.5k from an importer in San Francisco with 74k original miles, and in need of serious TLC.
It had been sitting for some time, and had developed considerable rust. But, it ran.
That gave me pause while contemplating the purchase, but I was really taken with the van’s size and configuration.
It has all wheel drive, an excellent power train (turbo diesel!), came with a lift from the factory, gets decent mileage, and comes equipped with lots of quirky, quintessentially Japanese bells and whistles…like curtains all around the passenger space that open and close with the touch of a button. So cool!
It also fits in a regular parking space, and is far more nimble than it’s larger RV style cousins. Not to mention it costs a fraction of what some of those cousins go for.
So, I decided to pull the trigger!
I then spent the next 5 months repairing and converting it.
Phase one included doing a fair amount of maintenance and mechanical repair.
This meant replacing as many fluids, hoses, belts, and components as I could.
The laundry list includes:
Main radiator hoses
Engine bay fuel lines
Oil and oil filter
Thermostat
Water pump
Alternator
Fuel filter
Flushed coolant
Timing belt, tensioner, and pulley
Crank and camshaft oil seals
Replaced and upgraded rear shocks
New front brake pads
Transmission fluid and filter
Front and rear differential service
CV boot, front passenger side
Then, came the interior conversion.
I wanted a setup that was comfortable, functional…and wasn’t overly complicated to build.
I spent A LOT of time combing through IG profiles and YouTube channels of people living the life, and ultimately stumbled across two profiles that caught my eye. BeOldLater and Brad Mitchell.
The former’s design being the layout I ultimately ended up going for.
Essentially, they built a bed platform that’s also a kitchenette, dresser, and cargo space. Triple duty, very nice and compact.


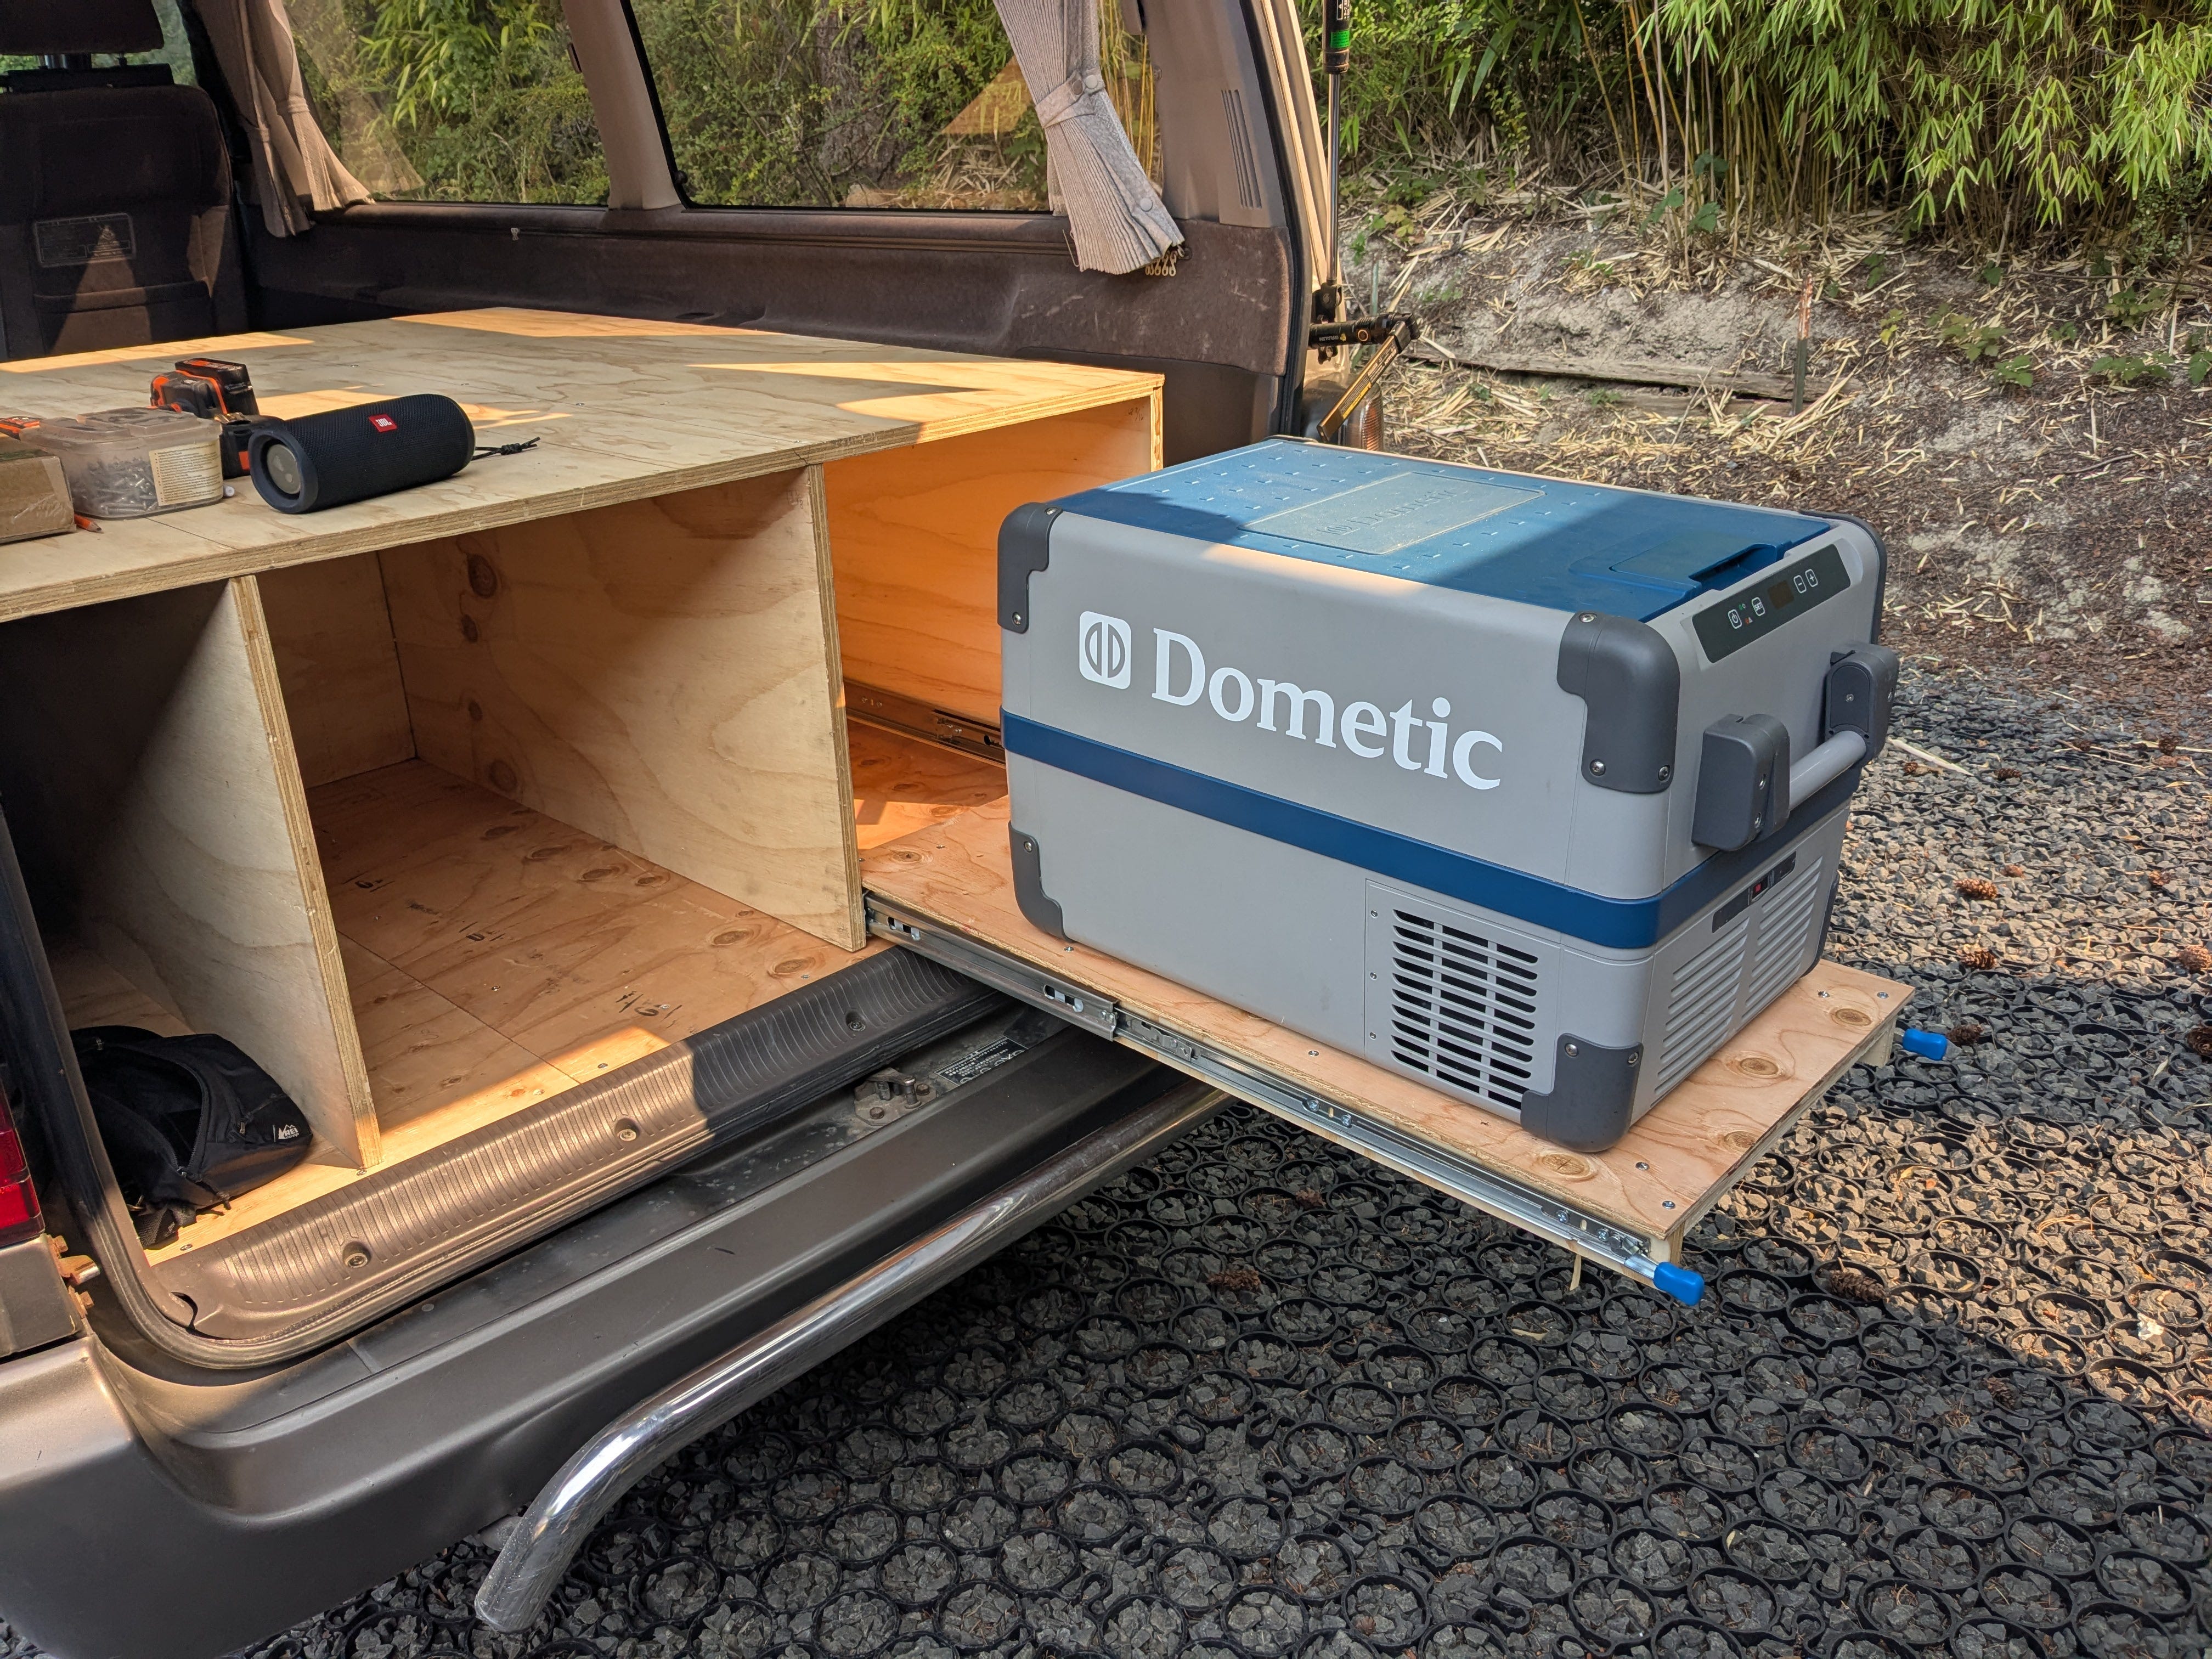
The platform utilizes sliding drawers very effectively. In practice, it’s pretty slick.
The build was also far more challenging than I anticipated. I can see why carpenters apprentice for as long as they do, it’s a very precise craft…and I mean precise.
Both the bed frame and drawers I ended up have to tweak considerably along the way.
For example, getting the retaining walls for the rear drawers to line up at 90 degrees to the backstop took multiple attempts. I set and glued them a total of three times, and even ended up having to completely scarp + rebuild the rear drawers due to wonky cuts and angles.
I became painfully aware of why everyone says measure twice, cut once! It was definitely a learning experience.
However, it all came together and I’m quite pleased with the results.
With a frame and storage sorted, I could now put peripherals in the van.
Here’s what I’m pack’n:
Bluetti AC180 - Power bank, keeps my stuff charged and running
Domenic CF35 - Mini fridge, 35 liter
Sony a6500 - Digital camera
Lenovo Thinkpad T480 - Bad ass laptop
E-reader - For reading things
Art supplies - Cake watercolors, drawing pad, and pens
Travel guitar - Martin Backpacker
Clothes - A week’s worth
Jackets - Rain and down puffy
Sleeping - A bag and quilt for warmth, plus an insert
Toilet - Dometic 975 portable (5.5 gallon capacity)
Cooking - Coleman propane grill and burner combo
Fuel - 1lb propane cylinder w/ adapter
Kitchen ware - 3 in 1 stainless steel camping pot set, with 3 coffe3 cups, and set of utensils. Hand crank coffee grinder. AeroPress. Solar oven. Collapsible silicone bowl and cutting board. Folding knife.
Bath - Roof rack solar shower with fold up shower stall, plus head attachment.
Potable water - 20 liter Jerry-can with internal filter.
Comfort - Mini camp chair, USB clip fan, bug zapper, frisbee, front window shade, and hammock.
Tools - Basic kit, electric tire pump, and jump box. Tiny wood blocks, oil and antifreeze coolant, duck tape, bobble jack, and zip ties.
Mods - Roof rack awning, awning room, and Thule roof rack box.
Lighting - KC bull bar flood lights, several mini solar lamps, a head lamp, and hand held lamp.
That’s pretty much all the stuff.
It may look like a lot, but I found space for everything, with room left over.
I’m curious to see how far my load-out will take me. I’m really excited for my travels to be an exercise in doing more with less.
Minimalism freaking rules.
Anyway, that about sums up the conversion and basic repair aspects of my build.
I’ll have a couple more posts that talk about the body work, structural repair, and electrical work that went into my build.
Thanks for reading, and hope to see you just a little ways down the road.
-Piers
Nice setup!!
YEAH BUDDY!!